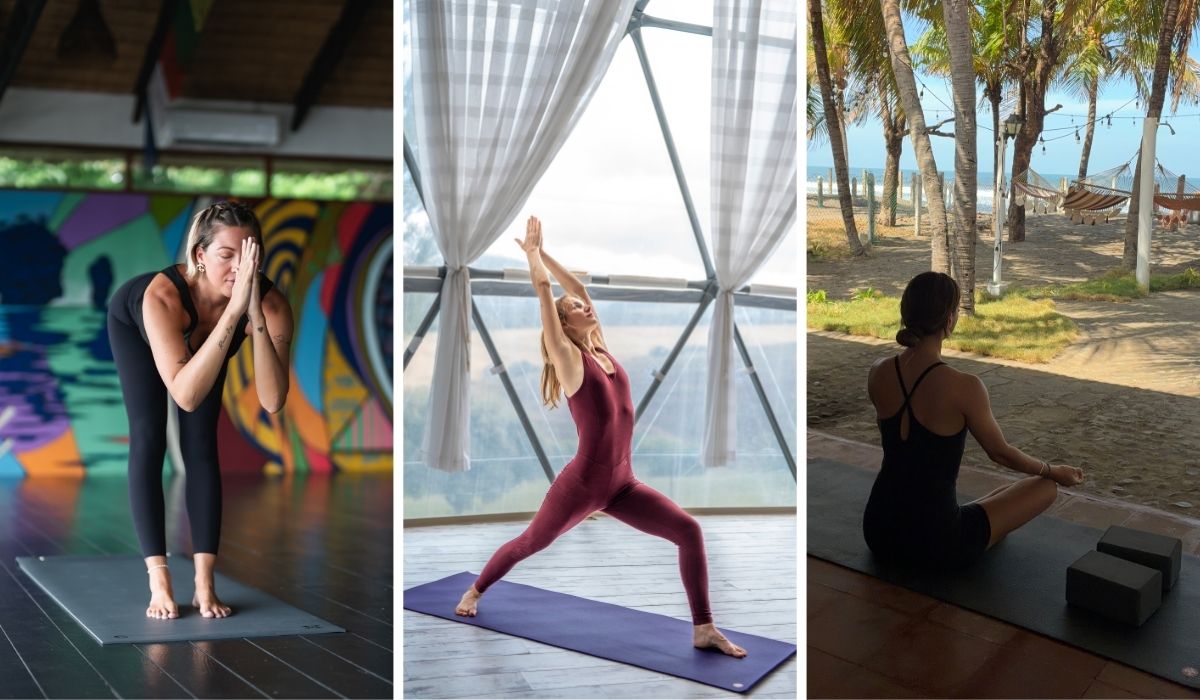
New to yoga? Congratulations on starting a practice! Building proper alignment from the beginning will ensure you get the most out of each and every class—and feel safe and secure in the process. To that end, here are ten basic yoga poses for beginners to master in the studio and at home.
BEGINNER YOGA POSES CHART

1. CHILD’S POSE (BALASANA)

Child’s pose is a restorative pose that you can come to at any time during a yoga class.
It’s first in our list of yoga poses for beginners to learn because it’s encouraged to default to at any time. Out of breath and need a break? Child’s pose. Injured and unable to do another pose? Child’s pose. Seriously, it’s perfectly acceptable to take a child’s pose as often as you like.
CHILD’S POSE BENEFITS
Child’s pose has the following benefits:
-
Incredibly calming
-
Relieves muscle tension
-
Lengthens the spine
-
Creates mobility in the hips
HOW TO DO CHILD’S POSE
-
From a kneeling position, widen your knees towards the edges of your yoga mat.
-
Point your toes and bring them to touch with the tops of your feet against the mat.
-
Extend your arms and hands forward to touch the ground at the front of your yoga mat.
-
Let your bottom come back to rest on your heels, creasing at the knees and hips.
-
Bring your chest forward keeping a tall spine and let your forehead and chest come to rest on or towards the mat.
MODIFICATIONS FOR BEGINNERS
-
You can do this pose with active and engaged arms or let them rest at your sides with hands towards the back of the mat.
-
Roll up a yoga blanket to place in the crease behind the knees to alleviate any pressure in the legs.
-
If your forehead does not touch the mat, rest it on a yoga block to allow your neck to release comfortably.
2. DOWNWARD-FACING DOG POSE (ADHO MUKHA SVANASANA)

Downward facing dog is a foundational yoga pose that challenges beginners and advanced practitioners alike.
If you dream of doing handstands one day, having a strong downward facing dog is your first step to getting there. Don’t be discouraged if you find this pose very difficult to hold in the beginning. With consistent practice, you will get stronger and it will get easier.
DOWNWARD-FACING DOG BENEFITS
Downward-facing dog pose has the following benefits:
-
Builds strength in the shoulders and arms
-
Stretches the spine and backs of the legs
-
Gets blood circulating as a gentle inversion
HOW TO DO DOWNWARD-FACING DOG
-
To measure the correct distance between your hands and feet, start in a plank pose.
-
Press firmly through your hands and feet and lift your hips towards the ceiling.
-
Keep pressing until you have a flat back. Your body should resemble an upside V.
-
Think about externally rotating through the biceps and shoulders while internally rotating through your forearms to engage the arms fully.
-
Reach your heels towards the mat while stretching through the backs of the legs.
MODIFICATIONS FOR BEGINNERS
-
Your fingers should be comfortably spread, but not strained apart.
-
Some studios teach downward-facing dog with generously bent knees and lifted heels to release tension in the lower back. Others prefer straightened legs with heels reaching towards the floor. Try both versions to see which you prefer.
-
Place a rolled blanket beneath your heels to offer extra support through the legs.
-
Place yoga blocks on their lowest setting beneath your hands for lift through the arms and shoulders.
3. UPWARD-FACING DOG POSE (URDHVA MUKHA SVANASANA)

Upward-facing dog is usually paired with downward-facing dog as a counter stretch. Proper alignment will ensure you don’t stress the lower back.
UPWARD-FACING DOG BENEFITS
Upward-facing dog helps to:
-
Stretch the entire front body and tops of the feet
-
Creates expansion through the chest and lungs
-
Builds strength in the arms and legs
HOW TO DO UPWARD-FACING DOG
-
Lie facedown on your belly with your head towards the front of your mat.
-
Place your hands on the mat close to your upper rib cage.
-
Point your toes back with the tops of the feet pressed flat against the mat.
-
Press through the hands to lift your torso and legs off the mat, keeping just the tops of your feet pressed down. (The rest of your leg should be hovering above the mat.)
-
Relax your shoulders away from your ears and spread through the collarbones.
-
Reach through the crown of your head to elongate the spine.
MODIFICATIONS FOR BEGINNERS
If you find this pose too challenging, it is perfectly acceptable to substitute it with a cobra pose instead.
-
To take a cobra pose, place the hands beneath the shoulders and lift using the chest and back muscles. Your legs will stay pressed against the mat.
-
In this variation the arms should not bear much weight at all. The rise will not be as dramatic as in an upward-facing dog because it would create too much strain on the lower back.
-
In all variations, keep the shoulders relaxed and away from the ears.
4. WARRIOR II POSE (VIRABHADRASANA II)

This standing pose is a staple used to transition in and out of many other poses in standing sequences. If you don’t feel the difficulty in the pose at first, pay close attention to the cues. It’s easy when done incorrectly but challenging (and impactful) when done correctly.
WARRIOR II BENEFITS
Warrior II pose can help to:
-
Strengthen the legs, back, core, and arms
-
Build stamina and endurance
-
Create heat and blood flow
HOW TO DO WARRIOR II
-
With your body facing sideways on your mat, extend your arms out parallel to the floor.
-
Step out to broaden your stance. Aim to place your feet wide enough to match the wingspan of your outstretched hands. (If this is too challenging for now, you can shorten your stance and work towards that over time.)
-
Point the toes of your front foot to face the front of the mat. Your back foot should be placed at a 45 degree angle.
-
Bend the front leg towards a 90 degree bend in the knee. Keep the back leg straight.
-
Turn your head to gaze over the fingertips facing the front of your mat.
MODIFICATIONS FOR BEGINNERS
The closer the bend in your front knee gets to 90 degrees, the more challenging this pose will be. Adjust to your needs.
-
Stay active and engaged through your back leg by pressing through the back heel.
-
Relax your shoulders away from your ears.
-
Reach actively through both hands to stretch across the collarbones.
5. WARRIOR I POSE (VIRABHADRASANA I)

Arguably more challenging than its counterpart, Warrior I is a strengthening standing pose similar to a lunge. It’s prominently used in the Sun Salutation B sequence.
WARRIOR I BENEFITS
Warrior I has the following benefits:
-
Builds strength in the lower body, core, arms, and back
-
Elongates the spine
-
Improves balance and stability
-
Supports good posture
HOW TO DO WARRIOR I
-
Take a slightly shortened stance than Warrior II.
-
The toes of your front foot will point towards the front of the room. Your back foot will be at a 45 degree angle.
-
Bend your front leg towards a 90 degree angle while keeping the back leg straightened.
-
Your torso should remain tall and face the front of your mat.
-
Extend your arms out and up towards the ceiling maintaining a shoulder’s distance between your hands.
MODIFICATIONS FOR BEGINNERS
-
Try to keep your hips level. You can bend your back knee briefly to check, adjust, and then straighten once even.
-
Widening your stance will give you more balance in this pose.
-
Substitute with kneeling lunges by lowering your back knee to the mat and pointing the toes back.
6. TRIANGLE POSE (TRIKONASANA)

This foundational pose is excellent preparation for the more advanced half moon pose. Don’t be afraid to use blocks to create space in the body as opposed to collapsing inward. It’s more important that you feel elongated than it is to make contact with the ground.
TRIANGLE POSE BENEFITS
Triangle pose has the following benefits:
-
Stretches the backs of the legs
-
Elongates the spine
-
Strengthens the side body
HOW TO DO TRIANGLE POSE
-
Take a wide stance on your yoga mat. As in the warrior poses, your front foot should be pointed forward and your back foot should be at a 45 degree angle.
-
Reach your arms out to either side.
-
Bump your back hip towards the back leg.
-
Keeping your arms outstretched, reach your torso toward the front of the mat and tilt down so your torso comes parallel to the mat.
-
Let the front arm come down to rest on the ground, your ankle, shin, or a block.
-
Think about keeping your outstretched arms, torso, and legs all in one plane, as if stuck between two walls.
-
Let your gaze turn to face either of your outstretched hands.
MODIFICATIONS FOR BEGINNERS
-
Resting the lowered hand on a block on its highest setting will create more space in the side body.
-
Think of the crown of your head as an extension of the spine.
7. HALFWAY LIFT POSE (ARDHA UTTANASANA)

You will encounter this brief pose through many vinyasa flows. (It’s also referred to as a Standing Half Forward Bend.) Because it’s a transitional pose, beginners may not have time to fully take in the alignment cues to refine their practice. Prevent repeated mis-alignment in this foundational posture by following the tips below.
HALFWAY LIFT BENEFITS
This transitional pose has the following benefits:
-
Acts as a counter-stretch to forward fold
-
Strengthens the back
-
Stretches the back of the legs
HOW TO DO AN EXTENDED FORWARD BEND
-
With feet together or hip distance apart, start from a standing forward fold. Let your head and neck hang loose and heavy.
-
Bring your hands to either your shins or the front of the thighs.
-
Lift and straighten your back to come parallel to the floor.
-
Roll your shoulders away from your ears.
-
Keep your gaze on the floor or lift your gaze slightly towards the front of the room.
MODIFICATIONS FOR BEGINNERS
-
The placement of the hands will depend on your flexibility. The goal of this pose is to straighten the back parallel to the floor so focus on that and let your hands rest wherever they reach comfortably. (Just avoid resting the hands on the kneecaps, instead opting for above or below.)
-
Lift through the back and chest—not the neck.
-
Your knees can keep a slight bend here to alleviate pressure in the lower back.
8. SEATED FORWARD FOLD POSE (PASCHIMOTTANASANA)

This seated pose looks simple but with proper alignment you should feel a stretch. The introverted posture can also provide a calming moment of reflection.
SEATED FORWARD FOLD BENEFITS
A seated forward fold:
-
Stretches the entire back body
-
Encourages soothing focus on the breath
-
Stimulates internal organs
HOW TO DO SEATED FORWARD FOLD
-
Sit on your mat with your legs reaching straight out in front of you.
-
Place your hands on either side of your hips to ground yourself evenly on the sit bones.
-
Inhale, reach the arms up, and sit up tall so your body is at a 90 degree angle.
-
Exhale and fold over the legs, keeping your back straight and creasing at the hip. Keep a tall spine as you fold over the legs.
-
Let your arms spill over your legs to grasp either the outside edges of the feet, ankles, or shins.
-
Let your head and neck release.
MODIFICATIONS FOR BEGINNERS
-
Some instructors teach this pose with straight legs, while others prefer generously bent knees. Try both to see which you prefer.
-
Sit up on a folded blanket to support the hips.
-
Try placing a block between the shins to give your head and neck an elevated place to rest and release more easily.
-
For easier reach, place a yoga strap around the bottoms of your feet and grasp on to it.
9. HAPPY BABY POSE (ANANDA BALASANA)

This pose is both playful and restorative. If it makes you giggle, all the better. Consider it a chance to connect with your inner child.
HAPPY BABY BENEFITS
Happy baby pose has the following benefits:
-
Relieves the lower back
-
Stretches the hips
-
Supports digestion
HOW TO DO HAPPY BABY
-
Lie down with your back on your yoga mat.
-
Bring your legs up towards the ceiling and bend them generously.
-
Reach your hands to grab onto the outside edges of the feet or the ankles.
-
Press your lower back into the mat for a neutral spine.
-
Pull your legs towards your body with your arms, while gently pressing away through the legs.
MODIFICATIONS FOR BEGINNERS
-
If your back feels rounded, shorten the reach of your arms to your ankles or shins. The integrity of the spine is more important than touching your feet.
-
Rock gently from side to side while holding this pose to massage the back and kidneys.
-
Try extending one leg out at a time while maintaining contact with your hand to stretch the backs of the legs.
10. CORPSE POSE (SAVASANA)

Although it may look like nothing, this pose plays an important role in aligning our bodies and minds. This restorative pose closes most yoga classes and gives you a chance to recover your breath, reflect, and feel the benefits of your practice.
Leave ample time to enjoy it at the end of any yoga practice.
(P.S. If this pose becomes a favorite, be sure to check out restorative yoga classes)
CORPSE POSE BENEFITS
Corpse pose has the following benefits:
-
Relaxes your muscles
-
Activates the parasympathetic nervous system
-
Encourages sleep
HOW TO DO CORPSE POSE
-
Come to lie down on your back.
-
Give your arms and legs ample space to splay out.
-
Let your palms face up.
-
Take inventory from your head down to your toes and relax your muscles with every breath. Don’t forget your jaw!
MODIFICATIONS FOR BEGINNERS
-
Cover yourself with a blanket or put on any extra layers before relaxing into this pose. Your body temperature cools down during corpse pose so it’s nice to stay warm and relaxed.
-
Add a yoga bolster behind the knees to let the lower back rest more comfortably into the mat.
-
Try pressing the back of your head into the yoga mat briefly to lift your chest and relax your shoulders down away from your ears as you release back onto the mat to create more space across the chest and collarbones.
FINAL ADVICE FOR BEGINNERS
As you begin to learn yoga poses and their shapes, it’s important to remember that yoga poses are meant to create space in the body. If you find yourself crunching or forcing your body into any of these yoga poses for beginners, refer to the modifications to create more space and ease. Also, don’t be afraid to use props!